Summary:
Pre-Installation Assessment and Planning
Every successful roof installation begins with thorough assessment and planning. This isn’t about quick measurements and material estimates—it’s about understanding your home’s unique structural requirements and environmental challenges.
We start by evaluating your existing roof structure, checking for any underlying issues that could compromise the new installation. This includes examining roof decking, identifying ventilation problems, and assessing the current flashing conditions.
The planning phase also involves selecting appropriate materials for Suffolk County’s climate. With our region’s exposure to coastal weather, ice dams, and temperature fluctuations, material choices directly impact your roof’s long-term performance.
Structural Integrity and Decking Evaluation
Before any new roofing material goes on, the underlying structure must be sound. This step often reveals hidden problems that homeowners never suspected—rotted decking, inadequate support, or moisture damage from previous leaks.
We remove old materials completely to expose the roof deck. Any damaged or deteriorated sections get replaced with properly rated plywood or OSB sheathing. This isn’t where you cut corners—weak decking will eventually cause sagging, leaks, and premature material failure.
The structural evaluation also includes checking rafter spacing and load-bearing capacity. Suffolk County homes built in different eras have varying structural standards, and modern roofing materials may require additional support. We know local building codes and ensure your roof meets current requirements.
Proper decking preparation includes checking for proper spacing between sheets, ensuring all edges are supported by rafters, and confirming that fasteners are appropriate for the decking material and local wind loads. This foundation work determines whether your new roof will perform as expected or develop problems down the road.
Weatherproofing and Moisture Barrier Installation
Before any new roofing material goes on, the underlying structure must be sound. This step often reveals hidden problems that homeowners never suspected—rotted decking, inadequate support, or moisture damage from previous leaks.
We remove old materials completely to expose the roof deck. Any damaged or deteriorated sections get replaced with properly rated plywood or OSB sheathing. This isn’t where you cut corners—weak decking will eventually cause sagging, leaks, and premature material failure.
The structural evaluation also includes checking rafter spacing and load-bearing capacity. Suffolk County homes built in different eras have varying structural standards, and modern roofing materials may require additional support. We know local building codes and ensure your roof meets current requirements.
Proper decking preparation includes checking for proper spacing between sheets, ensuring all edges are supported by rafters, and confirming that fasteners are appropriate for the decking material and local wind loads. This foundation work determines whether your new roof will perform as expected or develop problems down the road.
Material Selection and Installation Techniques
Choosing the right roofing materials for Suffolk County conditions requires understanding both performance characteristics and installation requirements. The most popular choice—asphalt shingles—offers excellent value, but not all shingles perform equally in our climate.
Architectural shingles provide better wind resistance and longer warranties than basic three-tab options. For Suffolk County installations, look for shingles rated for high wind speeds and impact resistance. These features matter when nor’easters and summer storms test your roof’s durability.
The installation technique matters as much as material quality. Proper nail placement, adequate fastener penetration, and correct overlap patterns ensure shingles stay put during severe weather events.
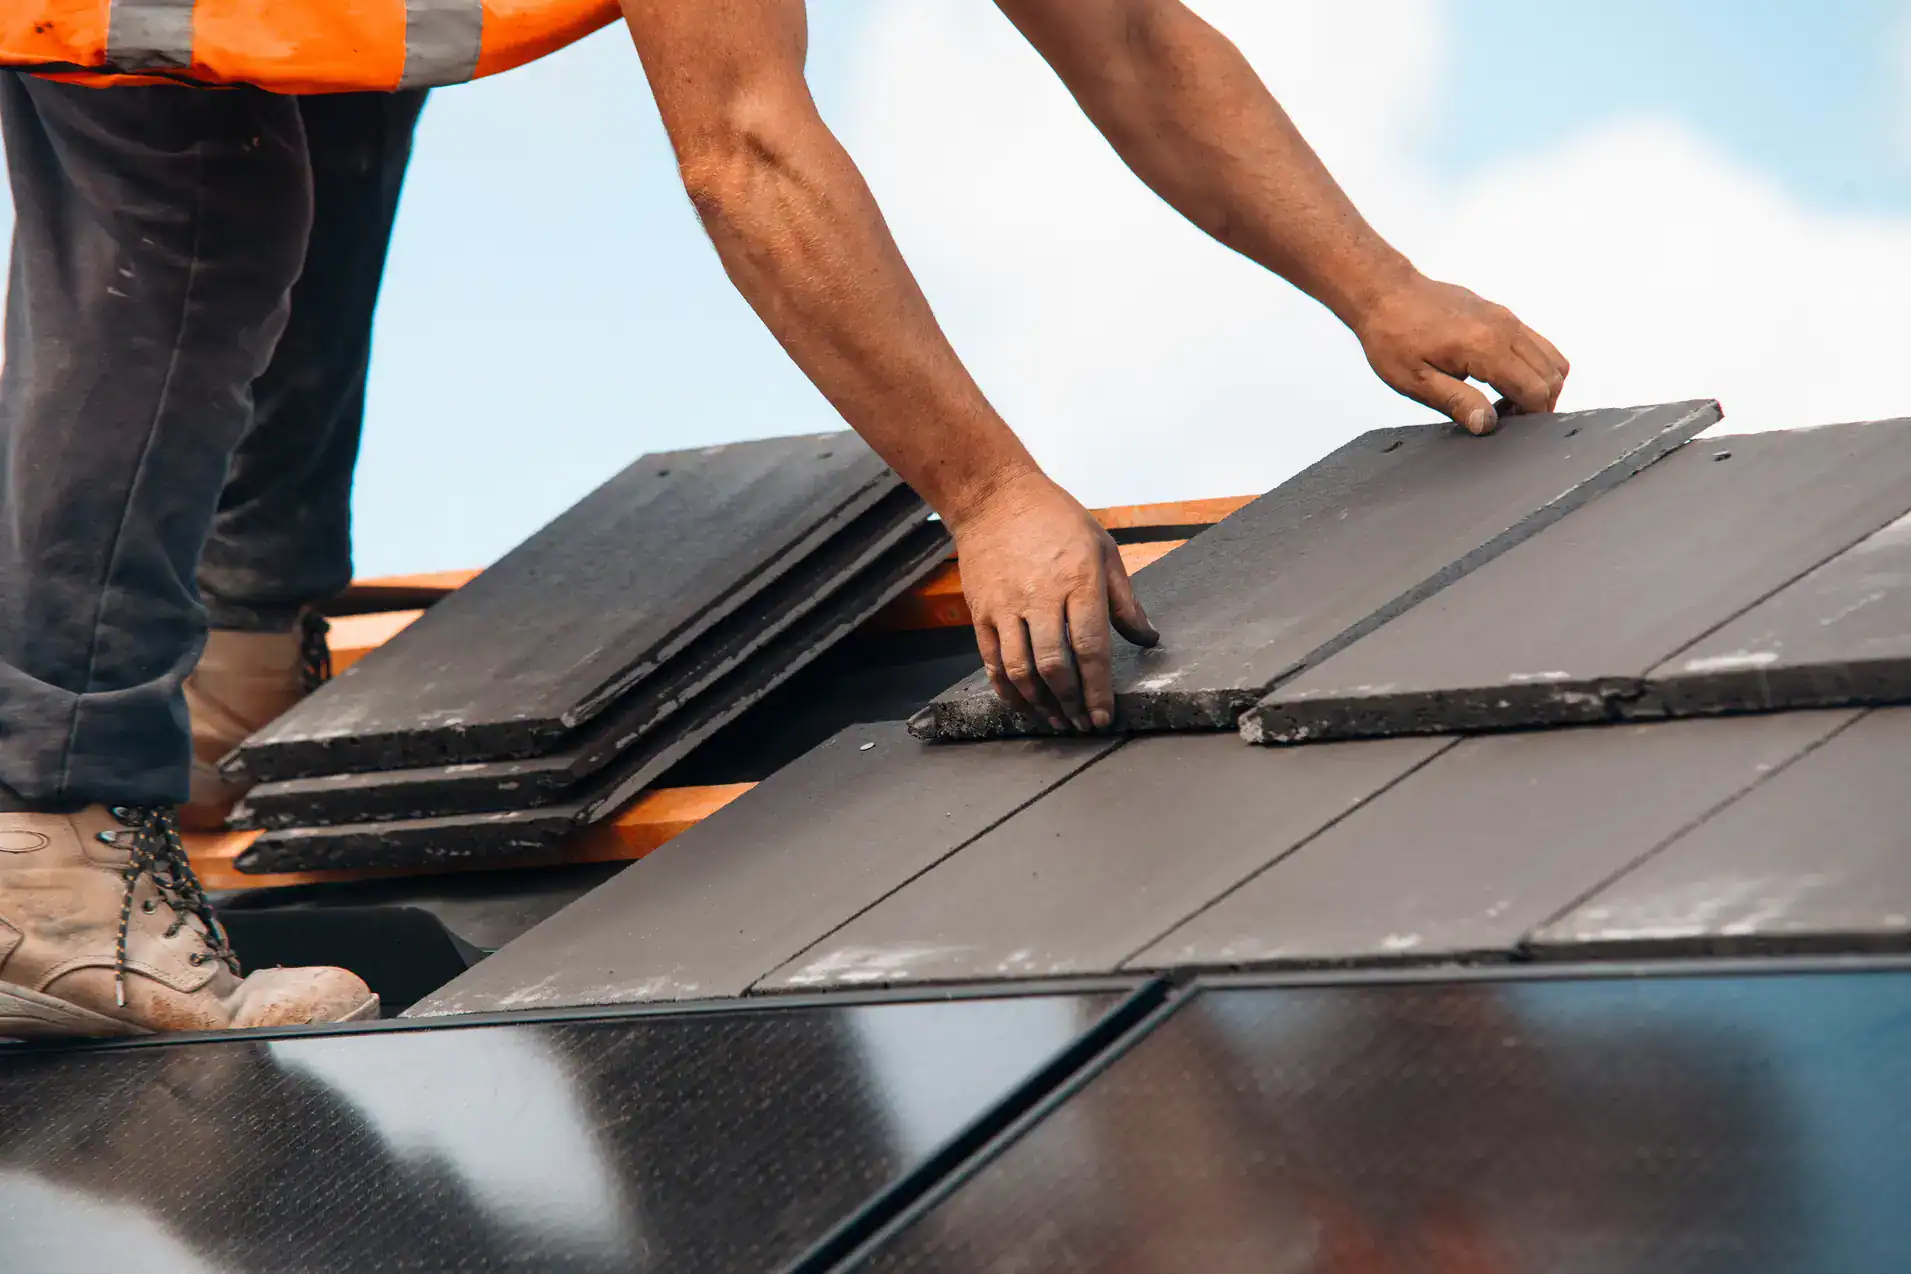
Shingle Installation Best Practices
Professional shingle installation follows specific patterns and techniques that maximize weather resistance and longevity. Each shingle must be positioned correctly, with proper exposure and alignment that creates effective water shedding.
Nail placement follows manufacturer specifications precisely. Too high, and shingles can blow off in high winds. Too low, and you create potential leak points. The number of nails per shingle also matters—Suffolk County’s wind exposure often requires additional fasteners beyond minimum code requirements.
Starter strips along eaves and rakes provide essential edge protection. These specialized shingles prevent wind-driven rain from working under the first course of field shingles. We use proper starter strip positioning and sealing to create a weathertight edge seal.
Ridge and hip installations require special attention to ventilation and weather sealing. Ridge vents provide essential exhaust ventilation while maintaining weather protection. The installation technique must balance airflow requirements with moisture exclusion, using appropriate ridge cap shingles and sealing methods.
Temperature considerations affect installation timing and techniques. Shingles installed in cold weather may not seal properly, while hot weather installations can damage materials. We adjust our methods based on weather conditions to ensure optimal performance.
Flashing and Penetration Details
Flashing installation separates professional roof installations from amateur work. These metal components direct water away from vulnerable areas where different roof planes meet or where penetrations occur.
Chimney flashing requires multiple components working together—step flashing along the sides, back pan flashing, and front apron flashing. Each piece must be properly sized, positioned, and sealed to prevent water penetration. The flashing also needs to integrate with the chimney’s existing waterproofing without compromising either system.
Vent penetrations need boot-style flashing that seals around the pipe while allowing for thermal movement. The flashing must be compatible with your roofing material and properly integrated with the underlayment system. Poor vent flashing causes more roof leaks than almost any other single factor.
Valley flashing handles some of the highest water volumes on your roof. Whether using open metal valleys or closed cut valleys, the installation technique must ensure water flows smoothly without backing up or creating turbulence that could drive water under shingles.
Skylight installations require careful coordination between the skylight manufacturer’s flashing system and your roofing materials. The flashing must shed water effectively while maintaining the roof’s overall weather barrier. We ensure proper integration with ice and water shield and careful attention to head lap requirements.
Quality Control and Final Inspection
A flawless roof installation concludes with thorough quality control and inspection procedures. This isn’t just a quick visual check—it’s a systematic review of every installation detail to ensure long-term performance.
The inspection covers fastener patterns, material alignment, flashing integration, and overall workmanship quality. We use checklists to verify that every aspect of the installation meets manufacturer specifications and local building codes.
Final cleanup and site restoration complete the project professionally. Your property should look better than when the project started, with all debris removed and landscaping protected. When you choose Rich’s Construction for your Suffolk County roof installation, you get the expertise and attention to detail that ensures your investment delivers decades of reliable protection.